Return to Mishe Mokwa

By Heather

Our visit to Mishe Mokwa was not intended.

We woke up early and drove a long, long way to our intended destination: La Jolla Canyon in Point Mugu State Park.

Sure wish I had checked this first.

That’s right. The trail has been closed for years and parts of the trail are entirely washed out. Too bad, because it sounds like it was once a delightful hike. Also, who’s been paying attention? Not me.

Fortunately, the Mishe Mokwa Trail is just down the road and I was a hike I knew Darren would enjoy in both scenery and length (on the shorter side).

It was a gorgeous day with all the right things: not too hot, not too cold, not too many people.


Afterward, we hit Neptune’s Net and had breakfast on the patio, believing the whole time that it just looked like the place in “Point Break” but was not the actual place

It was the actual place. So, I guess we have to go back.


2017 Hike for Heroes

american flag on mt baldy summitBy Heather

As much as I enjoy hiking solo, I always feel a twinge of sadness when I see photos of groups of hikers on their trips, having a great time and making memories together.

So, when SoCal Hiker announced the SoCal Hiker Team for the 2017 Hike for Heroes to Mt. Baldy, I decided to step out of my comfort zone and do this thing. Plus, it’s for a great cause,  supporting The Heroes Project, an organization that helps wounded vets redefine their limits after an injury.

My cousin Jessie, an Army nurse, decided to come along, too, so my introverted self didn’t have to face swarms of strangers unassisted. Phew! I’m a baby, yes.

The cause moved me in particular because hiking has taught me an unbelievable amount about myself. I had no idea that a shred of anything I do now existed in me before.

Thinking of those vets having that same realization, especially after once thinking their life might be over… it makes me tear up. It’s a great feeling to realize what you can do despite whatever obstacles you think might be in your way. It is quite literally life changing.

It got even better a few days after the hike – in a thank you email from the Heroes Project, I learned that as a direct result of the Hike for Heroes, USMC Sgt. Kirstie Ennis will climb Mt. Carstensz Pyramid and USMC Cpl. Carlos Torres will climb Mt. Ojos del Salado. Aw, yeah, I am so excited for them! Follow The Heroes Project on Instagram to keep track of Kirstie and Carlos!

I can’t wait to do this again next year, and I’m pumped to try and raise even more money next time!

12 Hiking Tips for First-Timers

Heather hiking catalina

From way back when I first started hiking!

By Heather

We all start somewhere.

I look back at some of my early mistakes and cringe. My first hiking shoes were my gym shoes! Once, I didn’t know my exact route. I just showed up and did it. Not smart. I’ve also hiked with earbuds in. It’s only pure luck that got me off the trail uninjured and alive.

Today, I see others making the same mistakes. Wearing jeans and a T-shirt, carrying no food and only a single 32 oz. bottle on peaks like Mt. Baldy and Cucamonga.

If you’re new to hiking, here are a few of my tips for hiking safely and living to tell the tale:

Remember that you can die

Anyone can die when they’re hiking. Newbies, experienced people, people hiking alone, people hiking in groups. They die from small mistakes and big ones. They’re old and they’re young.

Have respect for nature and the mountain you’re on. Always, no matter how well you know it.

Sam Kim hiked Mt. Baldy almost 1,000 times before it took him this winter. He knew that mountain better than anyone. If that isn’t sobering, I don’t know what is.

Start small and work up

In Los Angeles, there’s no shortage of places to get started with hiking. Griffith Park has tons of trails of varying toughness. Santa Monica National Recreation Area has even more, from short loop trails all the way up to the Backbone Trail.

Before heading to the mountains, I spent a lot of time hiking Los Liones. It’s a great hike for those who are just starting out – gorgeous ocean views, it’s challenging but not impossible and the crowds aren’t terrible in the early morning.

los liones pacific palisades shadow

Carry the 10 essentials

Have these 10 essentials, and you have the basics of what you need to stay safe:

  1. Map and compass
  2. Sunglasses/sunscreen
  3. Extra clothing (including extra socks!)
  4. Headlamp
  5. First-aid supplies (including moleskin and duct tape to cover blisters because bandages won’t always cut it)
  6. Lighter/matches
  7. Repair kit and tools, plus a knife
  8. Food
  9. Water
  10. Emergency shelter

Wear the right shoes and break them in

Wear hiking shoes or boots. Go to REI, try some on and see what feels good to you because everyone is different.

Some people like waterproof boots (me), others want trail runners, others want non-waterproof boots. Your shoes are a personal choice, so try a lot on, ask questions and weigh the pros and cons of each style.

Be sure to break them in, too. Don’t go on a 15-mile hike in brand-new boots.

prevent hiking blisters

Wear the right socks

You really want sock liners, which are a thin layer sock that helps wick moisture and prevent blisters.

You then want some nice, thick hiking socks. I’m very partial to my Therlos, and have turned many others onto them! Pack an extra pair in your pack, too.

Read up on how to prevent blisters.

Wear the right clothes

Cotton is the worst thing you can wear, especially on your torso. Once it’s wet, it stays wet, which will feel really unpleasant on a windy peak.

Look for moisture-wicking clothes to stay both dry and warm. On every hike, I wear a tank as the first layer, a long-sleeve moisture-wicking top and a down jacket. Sometimes I’ll add a down vest if the start temperature is really cold. Strip down and add on as needed from there!

me drinking from hydaway bottle

Pack the right amount of food and drink

What’s the right amount? It varies from person to person and hike to hike.

Hiking affects my appetite in really unpredictable ways – sometimes after a relatively short hike, I’m ravenous; occasionally, I won’t be very hungry at all on a longer hike, or even afterward; other times, I could eat a horse and feel that way through several meals.

All that to say, bring enough food. More than you think you’ll need. I try to bring something to eat about once an hour, even if I don’t actually eat once an hour. Working at altitude consumes a lot of energy, so you need to stay strong.

Hiking is not diet time. This is the time where you want sugar for bursts of energy. You want salty snacks to replenish what you’ve lost in sweat.

My food and fluids usually look like this:

  • 2-3 energy bars
  • 2-3 energy chews
  • A baggie of candies (Werther’s, Jolly Ranchers)
  • 2-3 bags of other food (candy or sweet things, usually)
  • Bag of pretzels or chips
  • 2 32 oz. bottles of PowerAde Zero
  • 2.5-L bladder

That’s generally what I bring for a five to seven hour hike on a moderately warm day, adjusting up or down for longer or shorter hikes and weather.

half dome covered in clouds

Half Dome all covered in clouds.

Check the weather forecast

When I first did Mt. Baldy, I didn’t check the weather. I just heard about this cool hike and went and did it. Cringe, again. Fortunately, it was a perfectly beautiful day.

Always check the weather! Especially if you’re going to a high elevation. It may be 90 down at the beach, but it may be a totally different day on top of a mountain. Generally, the temperature goes down 5 degrees for every 1,000 feet of elevation gained.

Visit Mountain Forecast to see the weather at various elevations – it goes to places weather.com doesn’t.

While you should be prepared for any situation, you’ll especially want to know if any rain, high wind or snow is expected. Rain can mean flash floods or landslides. High wind can knock you off a ridge. Hiking in snow requires experience, the right tools and training.

Be prepared to spend the night

That’s the advice Ranger Dave gave me when we met on Mt. San Gorgonio. I was indeed not totally prepared to spend the night.

I would have done fine – I always bring more food and fluid than necessary, and I layer up, so I could have stayed warm.

But I did not have an emergency bivvy on me, which would keep me warm no matter how low the temperatures dropped. Things happen, even on nice days. Storms move in, people get injured and can’t get off the mountain. Prepare for anything.

Know the etiquette

Aside from the obvious (don’t litter), there are some other rules of etiquette to mind:

  • Yield to hikers going uphill, although a lot of them will stand and let you pass because they want a break. If they do, say thank you and continue. If they don’t, wait for them. Even when it’s a big group, which frankly, I hate. You can pass them a lot more quickly than they can pass you. Grr.
  • Greet passing hikers. This also changes depending on where you are. In the wilderness, especially in the early hours, it’s hellos and how are yous all around. Say hello to everyone! When you get closer to civilization, people are much less chummy and sometimes even rude.
  • If you want to pass someone going slower, say “on your left” or ask to pass. Some people may not hear you hiking behind them, so say something and don’t be creepy.

Don’t be a jerk

If you want to be a certified hiking a-hole, follow these easy tips and you’ll have your badge in no time:

  • Pack it in, then drop it on the ground and leave it there.
  • Bag up your dog’s poop, then leave the poop by the side of the trail.
  • Bring your dog on a trail where dogs aren’t allowed.
  • Drop your toilet paper after you use it and let a ranger find it.
  • Get out your portable speakers and share your your sweet jams with everyone else on trail.
  • Smoke, then drop the butt on some dry pine needles and watch the world burn.
  • Immortalize yourself by carving your initials onto a tree.
  • Further immortalize yourself by spray painting any man-made structures with your name.
  • Create cairns with no purpose or meaning.
  • Say “You’re almost there!” to passing hikers when they’re still two miles from the summit.
  • Don’t bother to learn hiking etiquette, that’s old people stuff.
  • If you’re stopped for a break and you see some hikers coming up behind you, rather than waiting for them to pass before you begin the trail again, jump and cut them off. They’ll quickly overtake you, but, hey, for two and a half beautiful minutes, you were in the lead!
  • Bike the trail.
darren heather mt wilson

Look how cool we are.

Do be cool, like Fonzie

If you want to be a hiker other hikers are happy to see, it’s easy:

  • Respect solitude. Be quiet and don’t accost people who clearly want to be alone.
  • Help others. If you see someone who looks like they might be struggling or injured, stop and check on them. Offer food, water or supplies if you have any to spare. Hikers take care of each other.
  • Pack it in, pack it out. That includes your toilet paper and your dog’s poop.
  • Greet others. Say good morning as you pass people on the trail, and stop and chat for a moment if you can. Most people on trails are so nice, and they’re also happy to dispense wisdom and help you out. Learn from your fellow hikers and get better!
  • Encourage your fellow hikers! When you’re coming down from the summit and you encounter someone on their way up who is clearly struggling, let them know how great he/she is doing and how close he/she is to the top. Maybe it sounds a tad condescending, but I have always appreciated it whenever I’ve been on the receiving end.
  • If you do see someone vandalizing something, don’t confront them, as much as you might want to. Do try to snap a photo or video, then report them to a ranger. Also, shame-post the photo or video to social media.

My Experience With Diamox

standing on gorgonio summitBy Heather

Anyone who travels to high altitudes regularly has most likely heard of Diamox (acetazolamide), and probably even taken it. What is it?

In short, it’s a nifty little pill that helps you acclimate, thus reducing the chance you’ll experience altitude sickness.

Why should you take it?

To acclimate faster and prevent altitude sickness (AMS).

While I believe in acclimating naturally as much as you can, we all have lives, jobs and sometimes have to travel a bit to get to the next hike. Taking a few days to acclimate with all that usually isn’t in the cards.

This is why I look at Diamox as more of an “assist” rather than a replacement. Look at it the same way you look at vitamins: it’s always better to get the vitamins through food sources, but it isn’t always possible. Acclimate as much as humanly possible, then let Diamox do the rest.

Are there side effects?

Yes. Some people may feel nausea, though I never have. You should try it out on a low stakes hike to see how you do.

Diamox is also a diuretic, so you do need to increase your water intake. I make sure to start off really well hydrated by chugging a 32-ounce water bottle before hitting the trail, then continuing to drink steadily from there. I really haven’t noticed an excessive amount of urination, but I have noticed that within about an hour of taking it, I’m very, very thirsty and need to drink all of the water.

The weirdest and most frequent side effect I see is when it comes to carbonated beverages. Have a soda or beer after taking Diamox, and within just a few minutes it’s going to taste bitter, flat or both. This shouldn’t be an issue on the trail, though, because if you’re hydrating with Diet Coke and Sierra Nevada, you’re doing it wrong.

Does it work?

Absolutely! When my cousin got sick on Mt. Whitney, she was taking Diamox that had expired just a few weeks before. That was enough, though. The medication wasn’t effective and she got sick just a couple miles into the hike.

The year before, our whole group took the medication and summitted with no problems. We’re all believers in the stuff after that!

And don’t take Diamox after it expires. It loses effectiveness pretty much immediately.

Does Diamox mask symptoms of altitude sickness?

No, it doesn’t. It just provides an assist to help prevent you from getting sick in the first place. But for some people, it won’t matter.

You can rest assured that if you’re getting altitude sick, the Diamox is not going to mask your symptoms. If you’re taking Diamox and feeling altitude sick, stop and wait to see if you improve. If you don’t, turn around.

When should you take it?

Anytime you’re going to high altitudes. Anyone is at risk for AMS starting around 8,000 feet, whether you’ve had it before or not.

Your doctor can best advise, but I generally take it starting 24 hours before the climb, then continue during the climb. Drink it with a lot of water.

It’s also a good idea to have some extras on you in case you or another person gets sick. Taking a double or triple dose of Diamox when experiencing altitude sickness can help alleviate your symptoms (but you should still head down to fully recover).

Any questions? Please don’t ask me. This is not medical advice or gospel; it’s simply my own experience. I love Diamox, and it’s indispensable for a sea level-dweller like me.

For best results, consult with your doctor!

Mt. Wilson via Chantry Flats Trip Report

darren on the mt wilson gabrielino trail

By Heather

It’s been a long, rainy winter. That has put a fork in California’s drought, and it put a fork in a lot of my hiking plans over the last few months.

Since the high peaks are still covered in snow, Darren and I decided to make Mt. Wilson (elevation 5,710 feet) the first hike of the 2017 season (there he is above, wearing his brand-new Teton Daypack!). The route from Chantry Flats is a death march, so we girded ourselves for a long, hard day.

Fortunately, the burpees I’ve  been doing at the gym paid off big time. Maybe Darren will disagree, but I feel like we just about glided up that mountain. The hardest part, just after Spruce Grove camp, didn’t feel very hard at all. It was a challenge, but it was not the struggle I was prepared for.

Water and wildlife

Thanks to the aforementioned rain, the forest was greener than I’ve ever seen it and there was rushing water everywhere. There were at least four stream crossings, which are so much fun, especially when you have waterproof boots.

mini waterfall mt. wilson

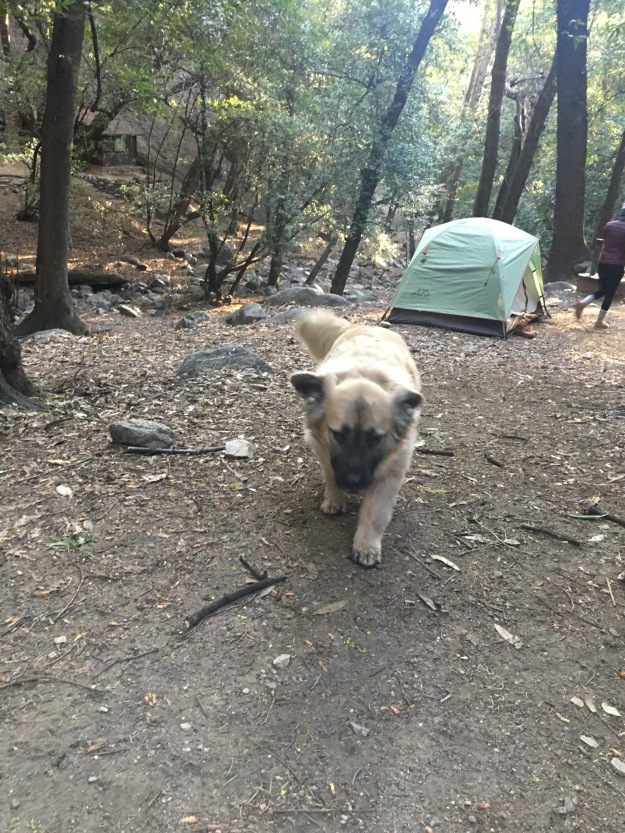
The only wildlife sighting we had was of this cute boy trolling for treats:

dog at spruce grove campground mt wilson california

dog at spruce grove campground mt wilson california
We tried patting him, but he only wanted food. Nothing else. Okay, then!

Cairn box snacks

For my last birthday, mom gifted me with a four-month subscription to Cairn, which I absolutely loved. Darren also received a subscription for Christmas. We enjoyed both so much, we’re now officially subscribers ourselves! Not a word of that was sponsored, by the way.

Since I haven’t hiked much since getting the boxes, this was my first time trying some of the treats they come with.

hiking trail mix
First up was this trail mix by Play Hard Give Back, which appears to be out of production.

It was all right. The ingredient mix was skewed heavily toward dried bananas and less so the more fun things on the list.

It was disappointing to find only a couple of peanut butter cups and protein bites in the whole bag.

Later on down the mountain, I had some JoJo’s Chocolate Bark, which actually held up decently well for it being a warm day.

The chocolate was really good, but I have issues with some of the claims. Mainly, how can a product that contains sugar also help you kick your sugar cravings? I’m skeptical. But I’m also not very concerned about sugar when I’m hiking, so for that purpose, it was a delightful treat!

chocolate nut bark

The one really hard part on Mt. Wilson, no matter what, is the end of the switchbacks just before the summit. They’re steep and have no shade.

It was a beautiful day at the top – sunny, the perfect temperature and clear views of the San Gabriels for miles and miles.

We had photos taken of us and shot photos for others.

darren heather mt wilson

Darren’s Pop Tarts were the talk of the summit, and there was some debate about whether another hiker’s suggestion of putting a frozen burrito in your pack to enjoy later, thawed and possibly warm, would really work.

I say no, and regardless, it sounds disgusting.

How to Improve Your Hiking Efficiency

me on the narrows mt baldyBy Heather

Everyone has their own unique hiking style. Mine is all about efficiency and making good time, but not necessarily rushing through the experience. That’s mostly because hiking is a huge time investment for me: My favorite trailheads are a good hour away, then factor in anywhere from five to 10 hours of hiking.

Essential vs. non-essential breaks

I recently learned about the concept of essential and non-essential breaks while hiking:

  • Essential breaks are for things like dealing with a blister or just stopping for a good rest to shore up your energy. They’re good breaks to take and you need them.
  • Non-essential breaks are breaks that you really don’t need but result from some sort of inefficiency. For example, needing to stop and get your sunglasses when they should have been within easy reach.

The goal, naturally, is to cut down on the non-essential breaks.

There are two primary ways to become more efficient: through the way you hike and your gear.

Let’s get to it.

Fuel up before you start

When I work out at the gym, I’m usually going on an empty stomach and it has never affected my performance much.

Not so with hiking. When you hike, it’s imperative that you start with a strong fuel base. If you start weak, it’s a tough hurdle to overcome. Hiking at high altitudes burns a lot of energy. This is not the time to think about dieting, but to truly shift your thinking to food serving as fuel. You need it to survive and keep going.

mac and cheese carb loading half dome

The night before a hike, I have a carb-y dinner, such as pizza or a burger and fries. In the morning, I start with a bunch of coffee (optional), and guzzle 32 ounces of water before I exit my car. About 30 minutes before the hike starts, I’ll eat an energy bar. By the time I’m ready to hike, I’m very strong, hydrated and totally ready to go.

From there, it’s all about consuming enough food and liquids to maintain that strength. You’ll be fine if you drink before you’re thirsty (peeing once an hour = hydrated) and eat before you’re tired.

Keep a steady pace

The more you can maintain a steady pace, the better off you’ll be. It’s tempting to rush through an easy portion of a trail and then attempt to keep that same pace when you get to a tough stretch. All you’ll do is wear yourself out and slow yourself down because of all the breaks you’ll take to catch your breath.

The best thing you can do for yourself is to start with a strong and steady pace and just keep it as much as you’re able to. You’ll need fewer breaks, you won’t get exhausted and you will ultimately be a faster hiker.

me wearing a fanny pack

Fanny pack

This summer, I purchased an Egogo bag (you can also just go ahead and snicker and call it a fanny pack, since that’s what it is). And then I watched my efficiency go through the roof. This one thing here has made all the difference.

Case in point: A few months ago, I climbed Mt. Baldy via the Old Baldy Trail from Baldy Village. The average time to do the hike is about 8 hours, and I did it in 7. That’s not because I’m super human, but because this bag is just so damn awesome!

Here’s what’s in it:

  • Sunglasses
  • Headlamp
  • Sunscreen
  • Hard candies
  • Energy chews
  • Energy bar
  • SPF lip balm
  • Pepper spray
  • Phone/GoPro

No more stopping and taking off the pack and losing momentum. Now I stop when I want to because I’m tired, and not for any other reason!

Use a bladder

Bladders are no secret, of course, but they make you more efficient by allowing you to drink as you hike. My Teton daypack came with a two liter one, and I love it.

Although a plastic taste has been a common complaint about them, bladders have gotten better in recent years and easier to clean. Look for a wide mouth one — they’re easier to air out. I usually crumple up a paper towel or two and place them in the bladder to hold it open and allow air to circulate.

jessie tom mt whitney hiking poles

Hiking poles

Hiking poles are knee- and life-savers on the downhills. I’ve used the Cascade Mountain Tech brand for a few years and I couldn’t be happier with them.

But they work on the uphills, too. Use your legs and push with your arms, and not only will you go faster, but you’ll conserve your strength and energy so you can go for longer stretches without needing breaks.

Those are my favorite ways to keep moving and seeing more of the outdoors.

If you’ve found a way to improve your efficiency, don’t keep it a secret!

Review: Hydaway Water Bottle

me drinking from hydaway bottleBy Heather

hydaway bottle attached to daypackFor my birthday last year, my very thoughtful mom hooked me up with four months of Cairn, which I have been meaning to talk about. Have you tried it? My short review is that it’s awesome.

One of my favorite things came in the first box: a collapsible Hydaway bottle.

It’s the perfect collapsible bottle, in my opinion. When I climbed Mt. Whitney in 2015, I loaded up on these plastic bottles, all of which eventually sprung a leak after just a few uses. The Hydaway is made of silicone and feels much sturdier than those flimsy things.

hydaway bottle collapsed in daypackIf you wan to hook it to your pack, it has a handle on the lid. If you have any water left when you’re done, the 21 oz. size (the largest one, which is what Cairn sent) will fit neatly into your cup holder.

The wide mouth makes it easy to clean, and it’s dishwasher safe if you put it on the top rack. When you’re done using it, it collapses completely flat.

It also comes in handy at the airport, where you’re forced to lug around an empty bottle that does nothing but take up space until you get through security and can fill it up. Now to can drop the Hydaway into your bag and not worry about it until you need it.

The bottle can be found on the Hydaway website and Amazon.

mt. whitney summit

Hiking in a group: why you should stay together

By Heather

In September, my cousin, her boyfriend and I made our second attempt on Mt. Whitney. It was such a fantastic, rewarding experience in 2015 that as soon as we got back to the trail head, we started talking about doing it again the next year.

Unfortunately, the 2016 attempt didn’t go as smoothly.

Expired Diamox

My cousin had been taking Diamox (an altitude sickness medication) that she didn’t realize had expired, so the altitude hit her fast and hard. But my cousin is also such a badass that she made it all the way to Trail Meadow despite vomiting for miles.

She worried that turning back would make her seem weak. Au contraire, cuz…I would have turned back at the second upchuck!

Why you shouldn’t separate from your party

Many people have asked me why I didn’t just continue on and send her back to the trail head. (Note to self: don’t hike with those people!)

There are several reasons:

  1. That’s how the vast majority of search and rescue calls start: the group breaks up and later, someone doesn’t return to camp as planned.
  2. It’s just not a nice thing to do. My cousin was sick,  vomiting and weak. You shouldn’t send someone in that condition off by themselves. You have a responsibility to your party to ensure that everyone is safe. No summit is worth ditching people so you can personally make it. Could you even enjoy it if you did that? I wouldn’t.
  3. It can discourage being honest about your condition if you think your party will leave you when you say you’re not going to be able to go further. If everyone knows that the group is going to stay together no matter what, you feel much more safe in saying that you need a long break or that you can’t continue.

Hiking solo is one thing; it’s all your call whether you keep going, quit, take a long break, whatever.

When you hike in a group, you’re a team and you stick together. You’re all in it, for better or for worse.

Please, never ditch anyone who isn’t feeling well.

It’s mean at best and could be fatal at worst.

6 Mental Tips to Survive Tough Hikes

By Heather

Just because hiking is so much fun doesn’t mean it’s not incredibly hard at times. In fact, I’d say that most of the time, it’s pretty hard. It’s hard to get up at 3:30 on a Saturday morning instead of staying in bed and reading while you sip coffee. It’s hard getting to the trail head in the dark and it’s cold and windy and you’d rather just stay inside your car and stay warm. Steep uphills are hard, downhills are hard, choking down those dry Clif bars is hard.

That’s personally what I love about hiking. The harder the hike, the more adversity there is to overcome, the sweeter the reward. Little moments on the trail propel me forward: A great view that might be even better in a half mile. There’s a promise of seeing wildlife, like bighorn sheep, deer or bobcats. Those little things are enough for me when I want to give up and go home. They tell me to keep going, there’s more up ahead.

But still, it’s hard.

Over the years, I’ve come up with a few ways to mentally survive hikes that are tough for various reasons, whether it’s length, steepness, elevation gain or all of the above.

Continue reading

Mt. San Gorgonio via the Vivian Creek Trail

By Heather

Way back before it was even officially summer this year, I finally went and climbed the tallest peak in Southern California: Mt. San Gorgonio, or Old Greyback as she’s known to locals.

What a fun, cool hike! It has it all: Stream crossings, multiple zones, amazing views and a triumphant photo opportunity on the summit to celebrate your accomplishment.

Continue reading